Wednesday, February 29, 2012

Seared Tuna Tacos with Caramelized Onions and Guacamole


I felt like I probably needed to counteract my entry on those brownies with something healthy but equally mouth watering. I chose to make tuna tacos because we have all had our fair share of fish tacos, so opting for tuna instead makes them a little different without being too off the wall.


These tacos fit with the message of this blog perfectly – they look phenomenal, but are phenomenally easy and take no time at all to make. Plus, divide up the components and they work really well with other things. Try seared tuna on a salad, the onions on burgers, chicken or in pasta sauces and eat guacamole on just about everything.


Seared Tuna Tacos with Caramelized Onions and Guacamole

For the tuna:
3 tuna steaks
¼ cup black pepper
2 tbsp salt
3 tbsp olive oil
1 lime

For the guacamole:
4 avocados
¼ - ½ package grape tomatoes
½ red onion
1 lime
3 tbsp Pace’s Picante Sauce
½ tsp Garlic powder
salt and pepper

For the onions:
½ red onion
1 tbsp olive oil
3 tbsp balsamic vinegar
½ tsp cumin

I started with making the guacamole while I let my tuna pan heat up to medium heat on the stovetop. Cut the avocados in half and scoop out the middles into a bowl. Mash with a fork but not to the point of being pureed, it’s nice if it’s a little chunky – a reminder that it comes from nature – rather than the pureed sauce-like guac form the store. Cut the tomatoes in half (quarters for the biggies), and scrape out some of the wiggly seeded centers. Dice the onion and stir the tomatoes and between ¼ to ½ of the onion (depending on how much you like onions). Squeeze in the juice of the lime. Stir in the Pace’s. Season with salt, pepper and garlic powder. You can also use cumin if you want. Place the pits of the avocados in the bowl (to stop the guac from becoming discolored) and store in the fridge.

Evenly spread the salt and pepper for the tuna on a flat dinner plate. Place each tuna steak down on the seasoning, press down, and then flip and repeat– the tuna will be damp enough that the salt and pepper will adhere. I leave the sides unseasoned and just have a heavily seasoned top and bottom. Plop the tuna on your pan – a grill pan or frying pan – and cook about 4 mins each side on medium heat until the fish is nicely seared. You’re looking for it to be browned and crispy on the outside, and still pink in the middle. When it is done take it off the heat and let it stand for a moment.


While the tuna is going, start another pan up for your onions. Add the oil and the other ¼ to ½ of your red onion. When they start to sizzle add the cumin and the vinegar. Let them cook in the pan for a bit until they are soft and crispy on the edges.

If you don’t have two pans I would do the tuna first, then the onions.  Then slice the tuna in thin ¼ inch slices.

When everything is ready, wipe off your pan and heat the corn tortillas a few seconds either side to soften them.

Assemble your taco on two corn tortillas (so the taco holds together) with a few pieces of tuna, some onions and some guacamole. Squeeze a little lime over the top.


This makes enough for four people to have two tacos each, with maybe one or two extra. Unbelievably fresh, healthy and still filling.


Debaucherous Dark Chocolate Brownies


I am calling these treats brownies because chocolate is their most prominent ingredient. But they aren’t really brownies – these have yet to be named. Some friends have been calling them a “four layer finish”, rather than brownies. That’s because they are beyond brownies – mega brownies – slutty brownies. They are diet shatteringly moreish and a best friend hug in one bite. They taste like things you remember from when you were younger, but all grown up.


I decided to make these for a friend who is getting some very exciting test scores back today. These brownies cannot be made just any day of the week – they are a special occasion treat. Today is a very special occasion and worth being a little bit wicked – in both senses of the word.

Debaucherous Dark Chocolate Brownies

1 box dark chocolate brownie mix (extra fudgy)
1 box chocolate chip cookie mix
1 box double stuff oreos
1 bag mini marshmallows
1 little bag of pecans (about ½ cup – see baking aisle)
½ cup vegetable oil
3 eggs
1 stick butter

The above ingredients apply to my specific kind of cookie and brownie mix – Betty Crocker. Read the directions on the back of your boxes to ensure that you have everything before you start.

Preheat oven to 350. Grease a 9 x 13 baking dish. Mix the chocolate chip cookies according to the directions. Spread the mixture in a thin layer on the bottom of the dish:


Then line rows of Oreos across the cookie dough, leaving a little space between each one. Eat the broken ones along the way:


Fill the holes with mini marshmallows. Mallows are surprisingly low cal, so grab a handful as you sprinkle this layer:


Mix the brownie mixture and stir in the pecans. Pour the mixture over the top of the other layers.


Bake for 30-40 mins, or until a fork comes out (almost) clean – you still want them to be a little bit gooey.


Have your glass of milk ready for when these come out of the oven and prepare yourself – you will be surprised how many of these you can eat in one sitting. Speaking of eating 12 brownies in one sitting – for your friends’ sake I would save these for celebration rather than commiseration, they could end up making break ups, exam weeks and PMS even worse than the usual 2 gallons of ice cream.


Tuesday, February 28, 2012

Roasted Chickpeas


I just came back from the most indulgent weekend I have had in a long time – a weekend complete with Mexican food, gourmet pizzas, champagne and Starbucks cheese plates (all my favorites). I wouldn’t be telling the truth if I said that I didn’t want to come back because of school work or something like that. I actually didn’t want to come back because I didn’t want to recommence that spring break diet. With t minus 6 days to go before the beaches of Punta Cana were supposed to be aghast at my new bikini bod, I decided all carbs, sweets, beer, cheese (the best things) better go. But then I got hungry… and pretty bored.


So I came up with this healthy snack. Protein packed to keep you full, with no bad stuff. Hello sunshine. 

Roasted Chickpeas

1 can chickpeas
3 tbsp olive oil
Salt and pepper
Seasoning of your choice (I love Tony Chachere’s Creole Seasoning)

Preheat oven to 400. Drain chickpeas and dry thoroughly between two paper towels. Spread out on a cookie sheet and discard the loose shells. Drizzle with olive oil and season with salt and pepper - salt them well because they do not come pre seasoned at all. Then roll the beans around with your hand to make sure they are all coated in oil and s&p. Put them in the oven and cook for 30 mins, turning occasionally. They should be crunchy crispy and golden brown on the outside when you take them out. When cooked, put them in a bowl and season with your favorite seasoning (I like Tony Chachere’s Creole Seasoning). Eat warm.


These are almost like fancy, healthy corn nuts. No 18-wheeler required. 

Wednesday, February 22, 2012

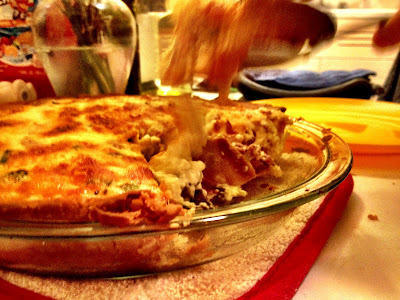
College Quiche Lorraine

Quiche is a great thing to make right after the weekend - when you have all of that stuff in your fridge that you had high hopes of eating at that banquet you planned on Friday, the casual dinner party for 20 on Saturday, and of course that church brunch on Sunday. None of which really happened. But your tortilla chips are all gone instead. 


Quiche accommodates all kinds of flavors: cheeses, meat (although I tend to use deli meats and bacon most frequently), and all kinds of vegetables -- from spinach to broccoli and even tomatoes. Just whatever is quickly approaching its sell by date in your fridge. So for this one I used prosciutto, a bit of bacon, mushrooms, an onion and green onions -- and wow it was great. Good for dinner tonight and lunch tomorrow. This one is pretty breakfast-y too so maybe I'll eat it then -- although that might just be the college kid in me talking. 


College Quiche Lorraine

1 package prosciutto (or ham)
4 strips of bacon (cooked) (plus a piece for snacking while you cook)
Half a package of mushrooms -- chopped up
1/2 onion diced
1/4 cup (rough) green onions (tops and bottoms mixed)
1 1/2 cups heavy cream
1/2 cup milk
4 eggs 
pinch of nutmeg
1 large cup of grated cheese (I used sharp white cheddar)

1 Pillsbury pie crust (I used my leftover from chocolate pie)

Preheat the oven to 400 and lay your piecrust in the pan. Poke some holes in the bottom of it with a fork and line the pastry with foil, add some rice or dry beans onto the foil (so that the pastry doesn't rise) and place the piecrust in the oven and bake for 10-12 minutes. 

Drizzle a tiny bit of oil into a pan and add the mushrooms and onion. Cook for about 4 mins then add the green onions. Then take a pair of scissors and chop pieces of the prosciutto into the pan. Cook together for about 3 mins. Take off the heat and crumble in the bacon. At this point your piecrust will be ready. 

Lower the oven temp to 375. In a bowl combine the eggs, cream and milk and whisk very vigorously. The only way your quiche can go wrong is by not having these ingredients thoroughly integrated. Add some nutmeg and quite a few shakes of pepper. You can add a little salt if following this recipe -- but remember cheese, prosciutto and bacon are all extremely salty. 

Line the bottom of the semi cooked pastry with the mushroom mixture. Then cover that with the cheddar cheese. Pour the cream and egg mixture over the top of the other ingredients and fill the pastry until it is almost full -- remember this won't rise too much so fill 'er up. 

Cook in the oven for about 35 mins. It will be golden brown on the top and it will make your room mates want to do this:


Monday, February 20, 2012

Turkey Masala Burgers with Roasted Tomato, Toasted Pine Nut and Arugula Salad


Upon starting this blog I could not wait to ask my good friend Malcolm to cook with me. He is far and away the best cook I know which was (and is) a little intimidating, to be honest. He has a real sense for flavor and through that has come up with some great avenues for experiment on a college budget. When I asked him last Thursday to cook with me he came up with a fantastic idea which fits perfectly with the mantra of this blog: Turkey masala burgers with roasted tomato, toasted pine nut and arugula salad. No, I’m not kidding.


I arrived at Malcolm’s apartment and was met with a glass of wine and the words “I love to use wine when I cook – and sometimes I even use it in the food!” I knew I was in for a great evening. From then on it was a veritable kitchen tango – leaning across to taste each others food – add some spices, stir something, squish something, and even clean something (queue Malcolm’s haunting phrase “dinner isn’t over until the dishes are done too”) I must say, together we came up with something pretty spectacular. A line of people followed their noses and traipsed into the living room as we ate – “I'm just looking for a taste” or "uhhh - do you mind if I try a bite?" Yeah, right.


Turkey Masala burgers

1 Package ground turkey
1 jar Tikka Masala sauce – Indian section at the grocery store
2 spring onions
2 cloves of garlic

Basmati Rice

1 box arugula (I am lazy so I buy prewashed)
1 box grape tomatoes
1 small package pine nuts (get the smallest they have because places really rip you off with nuts – giving you way more than you’ll ever use for a crazy price)
1 lemon
Parmesan (I buy a block – cheaper and less artificial tasting)

Olive oil
Balsamic vinegar
Dijon Mustard

Chop up onion and mince garlic and sauté them together in a pan with a little oil – save this pan when these are cooked. In the mean time put the raw turkey in a bowl. Add the onion and garlic to the raw turkey. Season with salt and pepper and whatever else you think looks good – we added some red pepper, curry powder and paprika – although if you just have s&p that’s fine. Pour in about ¾ the jar of Tikka Masala. Knead it into the meat with your hands. Cover and put it in the fridge.

Preheat oven to 400 degrees. Cut lemon in half and cut one of the halves into segments. Lay out the tomatoes on a cookie sheet and drizzle with olive oil, salt and pepper so each one is seasoned. Squeeze some of the lemon segments over the toms and then nestle the lemons in with them on the tray. Roast for about 12 minutes (keep checking – skins will get wrinkly and toms will soften).

Take the turkey out of the fridge. Roll it into balls a little smaller than your fist. Now you have a choice – if you are lucky enough to have a George Foreman grill (which Malcolm was) then cook them on that. If not (like me) then put a little oil in a pan and cook them on that. If you cook them on the stovetop remember to flatten out the balls a little with a fork. Remember that turkey is not like beef and it needs to be cooked all the way through – about 5-6 mins per side.

Then cook the rice according to the instructions on the package. Just a little per person. When the rice is cooked – push about 3 tablespoons of it down into the bottom of a ramekin or shallow glass. Let it sit there for a second and then turn the glass upside down and knock it onto the middle of a plate. This will make a little even stage or platform made of rice for your burger. Put your burger on top.

Pour about ½ cup of the pine nuts into the old pan you used for the garlic and green onion. Toast them in the pan. Pine nuts really need constant attention because they look like they aren’t even cooking and then burn very quickly. Keep stirring them

Make a ring around the burger and rice stand with your arugula. Add the tomatoes and the pine nuts. Mix some olive oil, Dijon mustard, a little squeeze of the lemon and a little balsamic vinegar in a bowl with salt and pepper and mix. Top the salad ring with the dressing. Cut some parmesan shavings off of your block and sprinkle the salad.


Our package of turkey made 2 burgers – but this is easily expandable.


Thursday, February 16, 2012

King Ranch Chicken

This is one of my most popular recipes. It is great in the summer and in the winter. It’s a great side dish at a barbeque, and it stands completely alone as a dinner with enough left over for a late night snack and lunch. I would like to dedicate this post to my roommate who, for anonymity’s sake, we will call Peg Bexsen.  She won my heart before we lived together when she said “you always know a good recipe when it has a coupl’a’ cans’a soup in it”. She knows what she's talking about. She has stuck by that and absolutely loves this dish: almost without fail, each time she walks in to the kitchen and sees me cooking Peg asks “Are you making your Mexican casserole?”

So I am sharing it with you. If you have Texan roots, like me, I am sure you are pretty familiar with this recipe – but it’s a good one to always have at the back of your mind when you’re in a pinch.


King Ranch Chicken

2 chicken breasts (split breasts, bone in skin on)
1 large onion, chopped
1 medium green bell pepper, chopped
2 cans cream of chicken soup
1 tablespoon chili powder/ red pepper (or more)
1 teaspoon garlic salt/powder
12 corn tortillas
2 cups grated sharp cheddar cheese
2 cans RoTel tomatoes (I buy 1 original and 1 hot – but gauge it based on hot spicy you like)

Fill a pot about 2/3 with water and boil. Boil the chicken breasts in the water (remembering it takes some time for them to cook through). When they are cooked, take them out and keep the water. Quickly soak tortillas in broth from cooked chicken (I've skipped this step no problem). In a greased 9x13 inch pan make a layer the tortillas and then layer the chicken. Mix the chopped onion and pepper in a bowl. In another bowl combine soup, chili powder, and garlic salt. Sprinkle the onion and pepper over the chicken and tortillas. Pour some globs of the soup mixture and part of 1 can of RoTel over and sprinkle with the cheese. Repeat layers until your casserole dish is full. Sprinkle the top layer with remaining cheese and pour over the remaining can of RoTel.


Bake, covered at 325 F for 40 minutes. Uncover and bake 15 more minutes. Make sure it’s brown-ish on top.


Serves 6 at least.


Another of my roommates calls this “Mexican Lasagna”. In all truthfulness, as she knows, I find this term hideously irksome – but it does help in understanding how to make it. Imagine the tortillas are the noodles and work your way up.  

This is fantastic for dinner on a Friday night, and even better when you come in and microwave it at 3am – and eat it on chips!

Wednesday, February 15, 2012

Chocolate Pie

I think the stigma against chocolate pie lies in the name. We all remember those cafeteria pies that you would choke down at the end of lunch at school, constantly reminding yourself “this is supposed to be a treat, so eat it”. It is for this reason that I will defer to my dad for this recipe and from here on out refer to it as “tarte au chocolat”. Everything sounds better en français, n’est-ce pas?

This tarte is essentially an indulgent flourless chocolate cake encased in a piecrust. But the best part is that the middle stays rich and gooey – like the world's best brownie. 


Chocolate Pie

1 premade piecrust (Pillsbury or just generic – the uncooked kind though)
2 100g bars of dark chocolate (minimum 70% cocoa - says on the bottom of the bar)
2 100g bars of milk chocolate
2 sticks of unsalted butter
½ cup sugar
4 eggs

Preheat oven to 375 degrees. Grease the pan. Roll out the piecrust and place it in your pie pan. Prick the bottom all over with a fork. Line the piecrust with a piece of foil and fill with uncooked rice or beans (just something to weigh it down). Cook the piecrust for 12 mins in the oven.  Remove foil and rice.

Meanwhile fill a pot about ¼ way with water and simmer. Place a heat proof bowl on top of the pot to make a double boiler. Melt the chocolate in the bowl – keep stirring so it doesn’t burn. Taste the chocolate with your finger or a piece of nearby fruit (essential). 


When chocolate is melted add the butter. Then when the butter is melted remove the bowl from heat, and stir in the sugar and the eggs. Mix until thick. Pour the chocolate mixture into the piecrust. Bake for 20-25 mins. When you take it out the middle might look a little wobbly – but it will harden when the pie cools.


Serve with ice cream.


I brought one of these pies over to an apartment of four guys last night and have since been ejected into university wide fame and popularity. I highly suggest you follow suit.  

Tuesday, February 14, 2012

Tortilla Soup à la Can


I have my grandmother to thank for the ingenious name of this recipe – although let’s keep it our little secret. That way no one will ever know that almost everything in this recipe comes from the canned vegetable aisle at the grocery store. In my humble opinion this is the best tortilla recipe out there, so your taste buds are in luck today.


This recipe makes a lot, so you need a big pot, but I have found that the longer it sits the better it tastes – so just freeze it in manageable amounts and defrost as needed. 


Tortilla Soup à la Can


2 split chicken breasts (bone in skin on)
1 can peeled whole tomatoes
1 can diced peeled tomatoes
1 can Rotel tomatoes and chilies (original)
1 can corn (not creamed)
1 can black beans (sometimes I get the seasoned kind – whatever you feel like)
1 Jar of Pace’s Picante sauce
10 corn tortillas (buy a bag and we will use the rest together in an upcoming recipe)
2 lemons
Bunch of cilantro (use the leftovers from Thai green curry)


Optional toppings:
Tortilla chips
Cheddar cheese
Avocado
Sour cream
Lemon wedges
More salsa
More cilantro


Fill a big pot up to about 2/3 full of water and bring to a boil. Season with salt and pepper and (if you have it around) throw in a chicken stock cube or two, some cumin or even some red (cayenne) pepper. Sometimes if I have an old carrot or some celery in my fridge I use that too. Whatever you want to flavor the water. If you just have S&P, that’s fine too. When the water is boiling put in the two chicken breasts and boil them until they are thoroughly cooked – remember this takes a pretty long time when you are boiling chicken (like 25 mins) – but always double check – you’re going to shred the chicken anyway.

When the chicken is cooked take out the breasts and set them aside to cool.  Pour out about half, maybe a little more, of the chicken water. I often try to pour out that oily film on the top of the water, but whatever floats your boat. Then return the pot to the stovetop and turn down the heat. This is the fun part.

Start by adding the vegetables that need to be drained: the corn and the beans. I drain them by using my can opener to open them almost all the way, then pushing the lid hard inside the can while dumping upside down over the sink. That way you lose the liquid but not the veggies. Add them to the pot. Then add the Rotel, the diced tomatoes, the chilies, and about ¼ of a jar of the Pace’s – more if you like it spicy.  Then comes the most fun part. Open the can of whole tomatoes, dump some if the juice in and then squish the tomatoes between your fingers so they fall apart in big pieces into the pot. Then take the tortillas and tear them up into smallish pieces and put them in the pot – they will thicken the soup as they disintegrate. Cut up your chicken and add that. Squeeze in the juice of the lemons and put the halves in the soup so it soaks up all of their fresh flavor. Last cut in some of the cilantro. An interesting fact about cilantro is that the flavor is not limited to the leaves, so go ahead and add some of the stalks too if you’re running low.

Let the soup simmer for a while and stir occasionally– as long as you want (within reason). I usually leave it while I set the table – okay, who am I kidding? My TV tray – and prepare my toppings. Serve it hot with as many of the above toppings you want or have around.


So to reiterate – you basically just dump everything in pot and let it cook for a while. You will be blown away.

Ole!


Monday, February 13, 2012

Thai Green Curry with Chicken

The purpose of this blog is to encourage college students like myself to cook meals that seem daunting (and impressive to the unsuspecting dinner guest) - but are actually extremely easy. Nothing complicated - except for maybe the title. That way when your date or boss or even your downstairs room mates come over for dinner they are wowed - and also none the wiser. So where better to start than Thai food. Thai dishes traditionally seem to have about 800 ingredients in them - but this curry has just nine, and that includes the chicken and rice. 


Thai Green Curry

4 chicken breasts (I go with boneless and skinless)
1 (or 1 1/2) cans of coconut milk (NOT coconut water)
3 tsp fish sauce
2 1/2 heaped tbsp Thai green curry paste (if you like spicy add more)
1 heaped tsp brown sugar (but can leave out if you don't already have it)
2 lemons
2 cups basmati rice 
green beans (to your liking - or the limits of the bag)
1 bunch of fresh cilantro 

Swish a little bit of olive oil around in a pan and heat to medium. Cut up your chicken into nice sized chunks, about 5 or 6 per breast depending on the size and throw them in the pan. Remember when you're cutting that chicken shrinks up when you cook it. Season the chicken with some salt and pepper. 

When the chicken is cooked through take it off the heat and set aside. Wash out pan and return it to medium heat on the stove. Pour in your can and a bit of coconut milk. As that simmers add in the fish sauce, curry paste, and brown sugar. I am a huge fan of lemons so I add the juice of 1 and a half lemons to the curry as it cooks. Then plonk the squeezed out lemons down in the sauce - you would be surprised how much flavor is left in them. Add the chicken, stir that around and reduce the heat. Simmer while you cook your rice and beans. 

Follow the instructions on the basmati rice package -- about 2 cups of rice to 8 cups of water. I like Mahatma brand the best and it is only about $6 for a bag that will last you a good long while. 

If you like to cheat - like me - buy the green beans that are already cleaned and in the microwaveable bag. Microwave them for about 15 seconds less that it says to ensure they stay crunchy. 

Then assemble: a scoop of rice on the bottom, then the curry with some chicken, then add a handful of green beans, then a sliver of lemon from the remaining half, and finally top it all with some cilantro. I just wash the bunch and chop the leaves off over the bowls with scissors. 

You can make this in individual bowls, or in one big bowl -- just be sure to remember that the rice absorbs a lot of the flavor of the curry -- so don't add too much rice or you will lose a lot of the flavor. 


And มีคุณไป! 

(I hope that's Thai for voila!) 


Easy, quick and delicious on a college dime.