Friday, July 6, 2012

Chili Salt Squid


I first had this amazing appetizer at E&O restaurant with my family. E&O is now one of our favorite restaurants, so we try to make a trip each time I come home - and each time we make sure and order chili salt squid. It is sort of like a more exciting version of fried calamari and simply delicious. 


My dad (my culinary inspiration) worked out how to make an interpretation of it at home and I figured it was perfect for this blog. Very easy, but still totally different from the usual bruschetta or mozzarella and tomato sticks that we all usually serve. Your guests will be blown away that you made this from scratch. 


Chili Salt Squid

2 cups cornstarch
4+ cups vegetable oil for frying
1 medium package frozen squid, thawed
2 red chilies
2 green chilies
1 spring onion
1 bunch cilantro
1 scant tbsp. sea salt

Heat the oil in a deep frying pan, it should be about 2-3 fingers deep. Spread the cornstarch out in a pyrex dish and add the squid. Cut some of the bigger circles of squid in half. 


Coat in cornstarch and add to the hot oil. Fry for about 4 minutes.


Only do a few pieces of squid at a time (don’t overcrowd the pan) and remove from the oil with a slotted spoon. Display on newspaper – fish and chips style.


Cut the chilies into small slices, leaving out some of the seeds. Sprinkle over the squid. Then cut up the spring onion (just the green part) and sprinkle over the squid. Cut plenty of cilantro over the top and finally sprinkle heavily with sea salt. Remember – these aren’t seasoned yet and need a lot of salt to balance all of the flavors.


Healthy Fridge Dinner


Some days time gets the better of you and you don’t get to the grocery store, so dinner has to come from what is already in your fridge. This is a healthy and pretty awesome dinner to have from ingredients that are already in the fridge.


Chicken with mushrooms and lemon with warm sautéed tomato and zucchini salad

4 chicken breasts
3 lemons
1 box mushrooms

2 zucchini
½ box cherry tomatoes

Pound out chicken so that it is thin and even. Squeeze the juice of one of the lemons over the chicken and slice another of the lemons and put a slice on top of each piece of chicken. Sauté in a little olive oil. When the chicken breasts are cooked through, cover them and put them in a warm oven.


Swish some more olive oil around the pan and add the mushrooms. Add the squeezed lemon skins and slice the third lemon into slices and add them to the mushrooms. Season liberally with salt and pepper. Add the chicken and cook for a few minutes together. When the mushrooms are browned, stick them in an oven proof bowl and put them in the warm oven.


Swizzle a little bit of olive oil around another warm pan and add the tomatoes. Cover and allow to simmer for about 5-7 mins. Slice the zucchini and then add them to the pan. Sauté for about 8 more mins until the tomatoes are bursting and the zucchini is lightly browned. Season with salt and pepper.


Spoon the mushroom mixture onto the chicken and serve next to the warm zucchini and tomato salad. 


Sunday, July 1, 2012

Hungarian Yogurty Chicken

In terms of the mantra of this blog (basically: cheap, easy, delicious and looks unbelievably impressive), Hungarian chicken is top notch. It’s a one-stop shop so, pair it with a green salad and you have your whole meal taken care of. The flavors are very clear and simple, while still a little different. This is perfect for a week night meal: it’s fast, simple, wholesome and healthy.


Hungarian Yogurty Chicken

3 chicken breasts, pounded and cut into strips
1 onion
1 large can diced tomatoes
½ small package of cherry tomatoes
1 tbsp tomato paste
1 bay leaf
1 scant tbsp. paprika

1 cup plain yogurt (need about a dollop per serving)

Basmati rice

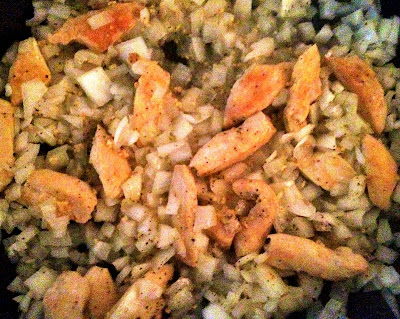
Sauté the chicken strips and the onion in a little bit of olive oil until the chicken is cooked through and the onions are translucent. Set aside. 


In a pan on medium-low heat pour in the can of diced tomatoes, the cherry tomatoes, the tomato paste, the bay leaf, paprika and season with salt and pepper. Cover and simmer for 10 minutes. After 10 minutes add the chicken and onions and simmer for another 10 minutes, just until the fresh tomatoes are bursting. 


Meanwhile cook the rice according to package directions. After 20 minutes total remove the chicken and tomato mixture from heat and try it to ensure the canned taste as well as the taste of raw spices has been cooked out. Serve over basmati rice and top with a splodge of plain yogurt. 


Saturday, June 23, 2012

Cinnamon Pull Apart Bread


Pull apart bread is one of the most fun things to bake. It is almost impossible to mess up and it looks amazing when it comes out of the oven. Totally perfect for a hopeless baker like myself. I like to make a couple of loaves when I make it, because usually I am making it as a gift or a contribution to a brunch or tea but then once I make it I don’t want to give it away. The same thing happens with my “Debaucherous Brownies”. Most of you who have received them didn’t know until now that you got a half batch…


This pull-apart bread takes a bit of time, but it is totally worth it. Especially for the feeling that you get when your contribution to the brunch is the first thing to be devoured. Or the feeling that you get when someone asks where you bought it. Yes, it’s that good.


Makes you hungry just looking at it, doesn’t it?


Cinnamon Pull Apart Bread

Bread:
3 cups all purpose flour plus a little extra
scant ¼ cup sugar
2 ¼ tsp dry active yeast – one envelope
heaped ½ tsp salt
3 ounces unsalted butter
1/3 cup whole milk
¼ cup water (room temp to warm)
2 eggs
1 tsp vanilla extract

Filling:
1 ½ cup sugar
1 ¼ tbsp. cinnamon
1 tsp nutmeg
2 ounces unsalted butter (melted)

Whisk together 2 cups of flour, sugar, yeast and salt. In another bowl whisk eggs.  In a small saucepan on the stove heat the milk and butter until the butter has melted. Remove from heat and add vanilla and water. Let mixture stand and cool a little bit.

Add the dry ingredients into the milk mixture and stir well. Then add the eggs. Make sure the mixture is cool enough that the eggs don’t cook. Stir until the eggs become fully incorporated – this takes a while. Add the remaining cup of flour and stir. The mixture will be sticky.

Place the dough in a greased bowl (don’t skip this part because otherwise it’s a nightmare to get out) and cover with plastic wrap and a clean tea towel. Allow to stand in a warm place until the dough has doubled in size (about an hour although you can do this overnight in the fridge).


While dough rises combine the cinnamon, nutmeg and sugar for the filling. In another bowl melt 2 ounces of butter. Set aside.

Grease your loaf pan


Sprinkle some flour over your kitchen counter, rub some on your rolling pin, and roll out the dough until it’s about ¼ inch thick. Paint on the melted butter onto the dough and sprinkle liberally with the filling. Then cut the dough into small rectangles, about 3 ½ inches by 2 inches.


Stack the rectangles of dough in small piles and squish them (standing on the long side) into the loaf pan. Sprinkle the top with any cinnamon sugar you have left. When the pan is full set aside for ½ an hour in a warm, dry place until the dough is about half again as big.


Bake at 350 degrees for about 30 minutes, or until the top is very, very golden brown. Serve warm. This bread does not keep well so it is best eaten the day it is made or the day after. 


Wednesday, May 2, 2012

Caprese Pasta with Broccoli


Sometimes the best pastas can be those made without sauce. By slowly cooking some vegetables in olive oil on the stove top, maybe adding a splash of white wine if you have any already open, the veggies become their own sort of sauce. If you choose vegetables that have a high water content, like tomatoes or zucchini, you can get a pretty full sauce and your pasta will be delicious.

When you don’t add sauce to pasta, it also means that your leftovers become a fantastic pasta salad for the next day. If you think about it, the pasta just continues to marinate, soaking up more flavor the longer you leave it. Two (plus) meals in one.

I chose to make this one based on a caprese salad (mozzarella, tomato and basil) but added some broccoli for more umph. You could also try adding some zucchini, squash, or even eggplant.

Caprese Pasta (salad) with Broccoli

1 box penne or fusilli pasta
1 package cherry tomatoes
1 bunch of broccoli OR one bag of pre-cut broccoli florets
1 bunch basil leaves
3 lemons
1 ball fresh mozzarella
Olive oil
¼ cup dry white wine (optional)
½ tsp red pepper flakes (optional)
Balsamic vinegar (optional)
Parmesan (optional)

Swish some olive oil around in a pan and turn on medium heat. 


Add the tomatoes (I cut some in half and left others whole), then the broccoli, then about ¾ of the basil. 


Cut 2 of the lemons in half, squeeze the juice in the pan and add the halves (to give more flavor). On one of the lemons cut off about 2 tsp of the rind and cut into very thin strips and then add to the pan. Add some wine, salt and pepper, red pepper flakes and allow to simmer about 20 mins, or until the tomatoes are bursting.


Boil a pot of water, add salt and pasta and cook through.

When the pasta is cooked, add it to the pan of cooking vegetables and stir so that the pasta is coated in the sauce.

Cut the mozzarella into cubes and add to the pasta.


I then added a dressing to my pasta. You don’t have to do this, but I chose to add it for even more flavor – and to make it even more like a caprese salad. So combine about 1/3 cup olive oil with about 4 tbsp balsamic vinegar and season vigorously with s and p. Stir and then pour over the warm pasta salad.

Try adding grilled chicken if you want.


Garnish with more strips of basil and a lemon wedge. 

Tuesday, April 10, 2012

Breakfast Bread Pudding


This is essentially an egg casserole, but with fewer eggs and more bread. When it is cooked it is just like an egg-y breakfast-y spicy bread pudding. I came up with this when I (accidentally) volunteered to host an Easter brunch for five hungry boys. As I discussed in Baked Oatmeal, the problem with eggs is that they sort of come out one at a time and get cold very quickly, which makes it difficult for everyone to eat together (the best part of brunch in my opinion).


This casserole takes care of your egg, toast and breakfast meat all in one go – and everything comes out at once so everyone can heat a hot breakfast together.

Breakfast Bread Pudding

1 loaf white rustic (crusty) bread – from the bakery section in the grocery store
1 lb spicy breakfast sausage
16 eggs (for a 9 x 13 Pyrex dish) - 12 eggs for smaller dishes 
2 cans diced green chilies
½ finely diced onion
1/3 cup whole milk
1 bag sharp cheddar or jack cheese

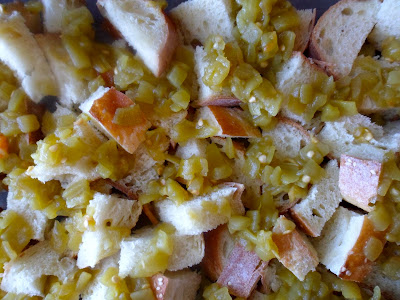
 Preheat oven to 350. Slice the loaf of bread into thick slices, and then cut the slices into about 1 inch cubes. Line the bottom of your Pyrex casserole dish. Then evenly spread around the chilies, then the onions. 


Cook the sausage on the stove top, breaking the meat into lots of pieces (not patties like we are all used to). Add the sausage to the bread, onions and chilies.


 Sprinkle the whole mixture with cheese.


In another big bowl mix together the eggs and milk. Whisk well. When I am adding eggs, I crack them  individually in a separate small bowl before adding them to the big bowl – this is because if one egg has gone bad, you haven’t ruined the whole mix of eggs and milk by cracking it in directly. Season the egg mixture with lots of salt and pepper.

Pour the egg mixture over the bread layer in the casserole dish. 


Dish should be about 2/3 full, with all of the dry ingredients barely submerged in the egg mixture. Allow to sit for as long as you can – up to overnight in the fridge.


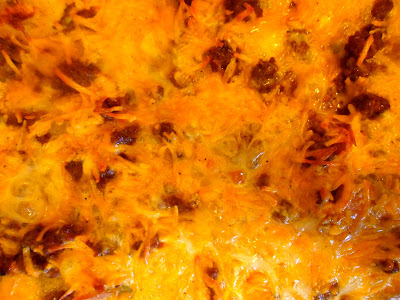
Bake for about 20 minutes, or until the eggs have cooked. I added more cheese on top of the eggs for the last five minutes.


I couldn't even stop myself from trying a couple of bites before I took a picture of it:


Sunday, April 8, 2012

Quinoa Cakes


Quinoa is an interesting thing. It is a grain, but it sort of looks like couscous and tastes sort of nutty or earthy. It is delicious – not wonder it is a “superfood”. Very high in protein but not in fat. Aka you feel like you have eaten a humungous plate of your favorite pasta, but without the calories. I love tricking my body with this kind of thing – it makes being healthy so much easier.


Quinoa Cakes with Lemon, Capers and Parsley

1 ½ cups raw quinoa
2 ¼ cups water
Chicken stock cube
1 cup unseasoned bread crumbs (or panko)
½ yellow onion
1 can artichoke hearts
1/3 cup parmesan
2 cloves of garlic minced
¼ cup capers
1/3 (ish) cup flat leaf parsley
Juice of 2 juicy lemons
Zest of one lemon
4 eggs
S and P
Splash of water – up to ¼ cup
About 3 tbsp olive oil for cooking


Rinse the uncooked quinoa in cold water before cooking. Add the chicken bullion cube to your cooking water. According to package directions boil the water then add the quinoa, cover and simmer for about 15 mins until all the water has been absorbed. Cool. This can all be done in advance.


In a bowl combine the quinoa, breadcrumbs, garlic, onion, capers and parsley. Drain and roughly chop up the artichokes and through them in For the parsley I don’t measure exactly. Instead, wash your whole bunch and take a pair of kitchen scissors and cut the parsley over the bowl until you feel like there is enough. Remember you want a little bit per cake – so it will seem like a lot until you stir it in. Add the parmesan. Squeeze in the lemon juice. Then carefully cut off thin slices of lemon rind with your knife (if you don’t have a zester or cheese grater – I don’t). Cut these slices into tiny strips and add them to the mix. Add the eggs and the salt and pepper.  Stir a LOT until the mixture becomes sticky. If it is not wet enough add a splash of water.


With your hand pick up a ball of the quinoa and press it into a pancake in your hand. It should be about ¾ inch thick. Place them in a pan with some olive oil and sauté about 3 mins per side.

Tips for this:
  •           The bigger the cake the easier – start big and work your way to small. The small ones look better, but fall apart more easily. This recipe makes about 18 cakes so you have some room to experiment.
  •          Don’t try to do too many at a time. I do three or four maximum. They can be tricky to flip and can be delicate so for best results, don’t overcrowd the pan.
Serve over salad.


Salad:
1 box spring salad mix
1 bag carrot chips (buy precut at the grocery store – maybe buy some hummus for the left over carrots too)
1 cucumber
1 box beansprouts (mung beans)

Dressing:
Olive oil
2 tbsp dijon mustard
2 tbsp lemon juice (fresh)
Lots of salt and pepper

Cut the carrot chips into thin slices. You can buy whole carrots it is just more if a hassle to cut them. Cut up the cucumber. Assemble all of the salad components in a bowl – use a handful of mung beans, carrots and cucumbers – mix everything together and divide onto plates. Mix the dressing in a separate bowl.

Add a few quinoa cakes per plate right on top of the salad – I did three but was feeding hungry boys. Just before you’re about to eat pour the dressing over top – that way the cakes will stay crispy but still absorb some of the flavor of the dressing.